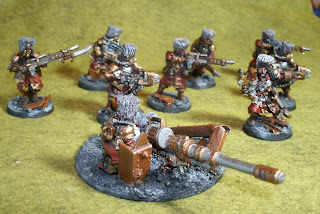
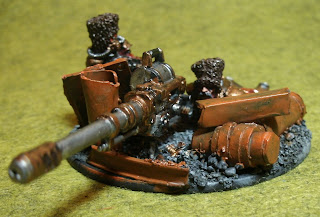
I won't claim to take the best pictures of my mini's, but I think I take adequate pictures. My setup is pretty simple: a gooseneck desk-lamp with a Daylight CFL bulb, some olive felt that I also use as a gaming surface, and a piece of light blue styrene that I use as a reflector to break up shadows. As for the camera, I use a GE A1050 which was a bargain at 50 bucks.
The camera sits on a small tabletop tripod. One trick that I've found is that it's best to not point the light directly at the mini's but slightly over it. I usually have the light off to the right, then I use my left hand to position that piece of styrene you see in the corner off camera to reflect light into any shadows that I want to eliminate I can also lean the reflector against the tripod legs. I occasionally will throw a small box under the felt to use as a stage for the
minis being photographed.
For 'post production', I just use the picture manager tool that comes with windows to crop, adjust, etc the pictures. all pretty basic.
Wednesday, September 22, 2010
Sunday, September 19, 2010
The Russians are Coming!
Finally, I replaced my camera (for half the price I originally payed for the same model. So now I can post some pics of my Vostroyans. I went for the standard studio red scheme, painted pretty much according to the old White Dwarf article. So that I could match it exactly, my wife even gave me a fresh pot of now OOP, Brazen Brass from her own stash (that my friends, is true love)
First up is the CO and squad. I based him with so that he could strike a suitable heroic pose, complete with evidence of the effects of the Emperors Artillery.
The urban themed basing is accomplished pretty easily by just gluing on random bits of scrap structural shapes from other projects. painting that a rusty color (bestial brown, with a blazing orange dry brush, and drybrushing the gravel with various shades of grey.
Next are the first two vet squads. Each squad has a different color drybrush on the hat. Differentiating the squads was a 'Paint Point' at the NOVA Open. I've since discovered that it also makes my life easier during deployment and pack up.
Now the inevitable Melta-vets. GW never made vossies with melta-guns so I converted the flamers.
Psyker Battle Squad converted from Empire Flagellants. The Overseer is built from the Cadian Command Squad box with the Peaked-Cap head from Baneblade sprue. Green trim signifies the Special Branch and ties him in with the Psyke rs.
rs.

First up is the CO and squad. I based him with so that he could strike a suitable heroic pose, complete with evidence of the effects of the Emperors Artillery.
Don't worry, that building fell on you for the greater good.
The urban themed basing is accomplished pretty easily by just gluing on random bits of scrap structural shapes from other projects. painting that a rusty color (bestial brown, with a blazing orange dry brush, and drybrushing the gravel with various shades of grey.
Next are the first two vet squads. Each squad has a different color drybrush on the hat. Differentiating the squads was a 'Paint Point' at the NOVA Open. I've since discovered that it also makes my life easier during deployment and pack up.
The Autocannon Teams were build by grafting a plastic autocannon onto the arms of the heavy bolter models from the Vostroyan Infantry Squad box. I used some styrene rod to make the spent shell casings
Now the inevitable Melta-vets. GW never made vossies with melta-guns so I converted the flamers.
Psyker Battle Squad converted from Empire Flagellants. The Overseer is built from the Cadian Command Squad box with the Peaked-Cap head from Baneblade sprue. Green trim signifies the Special Branch and ties him in with the Psyke
 rs.
rs.Finally, the motor pool:

And artillery support
Finally every guard army needs at least one really big gun:
Subscribe to:
Comments (Atom)


