Friday, August 31, 2012

Tale of 4(ish) Gamers -- Conclusion

Back in May, I entered into my FLGS's Tale of 4 Gamers contest -- 500 pts per Month up to 2000 pts by the end of Aug.  I haven't done the best job of posting my progress but I did complete the challenge.  In my case I used the occasion to get to some models done that had been hanging around for a long time.  Here's the result:  2000 (or maybe a bit more) points of Grey Knights:

Draigo and Friends, a Librarian, a squad of Termies, a squad of Purifiers in  a Razorback, a Ven Dread, a Storm Raven and a Culexus

Is this a competitive army?  Probably not but it sure is pretty, and it was a lot of fun to finally get on the table.

Oh and the challenge? I won, so I'm now the proud owner of  a special edition red GW Paint station.

Wednesday, August 29, 2012

Stretched Stormraven Part 2

In Part 1, I covered stretching the Stormraven and lighting.  I left off with figuring out what to do with the batteries.  I decided to mount the batteries on the base for a couple of reasons:  first, I didn't like the idea of having to retrieve the batteries from inside the model in order to change them, second, I didn't like the idea of putting that much additional weight up on top of the flying stand. 

My first thought was to use parts of the crashed Aquila Lander from the old Battle for Macragge starter set; ultimately I couldn't fit the 3 AAA battery pack under any of the bits in a way that would fit on the base.  Looking around, I found a disused Leman Russ hull that had once been a Looted Wagon in my son's Ork army -- perfect.

Here's the boring electrical stuff -- the red LED helps in debugging the connection to the model as it can be a bit finicky.


I opened up most of the bottom of the hull and expanded the turret ring hole slightly to allow the flying stand to fit throught.  The bottom of the clear flying stand ended up getting slimmed down a bit to allow the batteries to fit.  The Russ itself I decided to decorate as a Traitor Guard tank using some Chaos sigils etc


Here's how it looks all painted up


And the Stormraven itself:


And of course the reason for the base, the lights


Monday, August 27, 2012

Grey Knights Venerable Dreadnaught

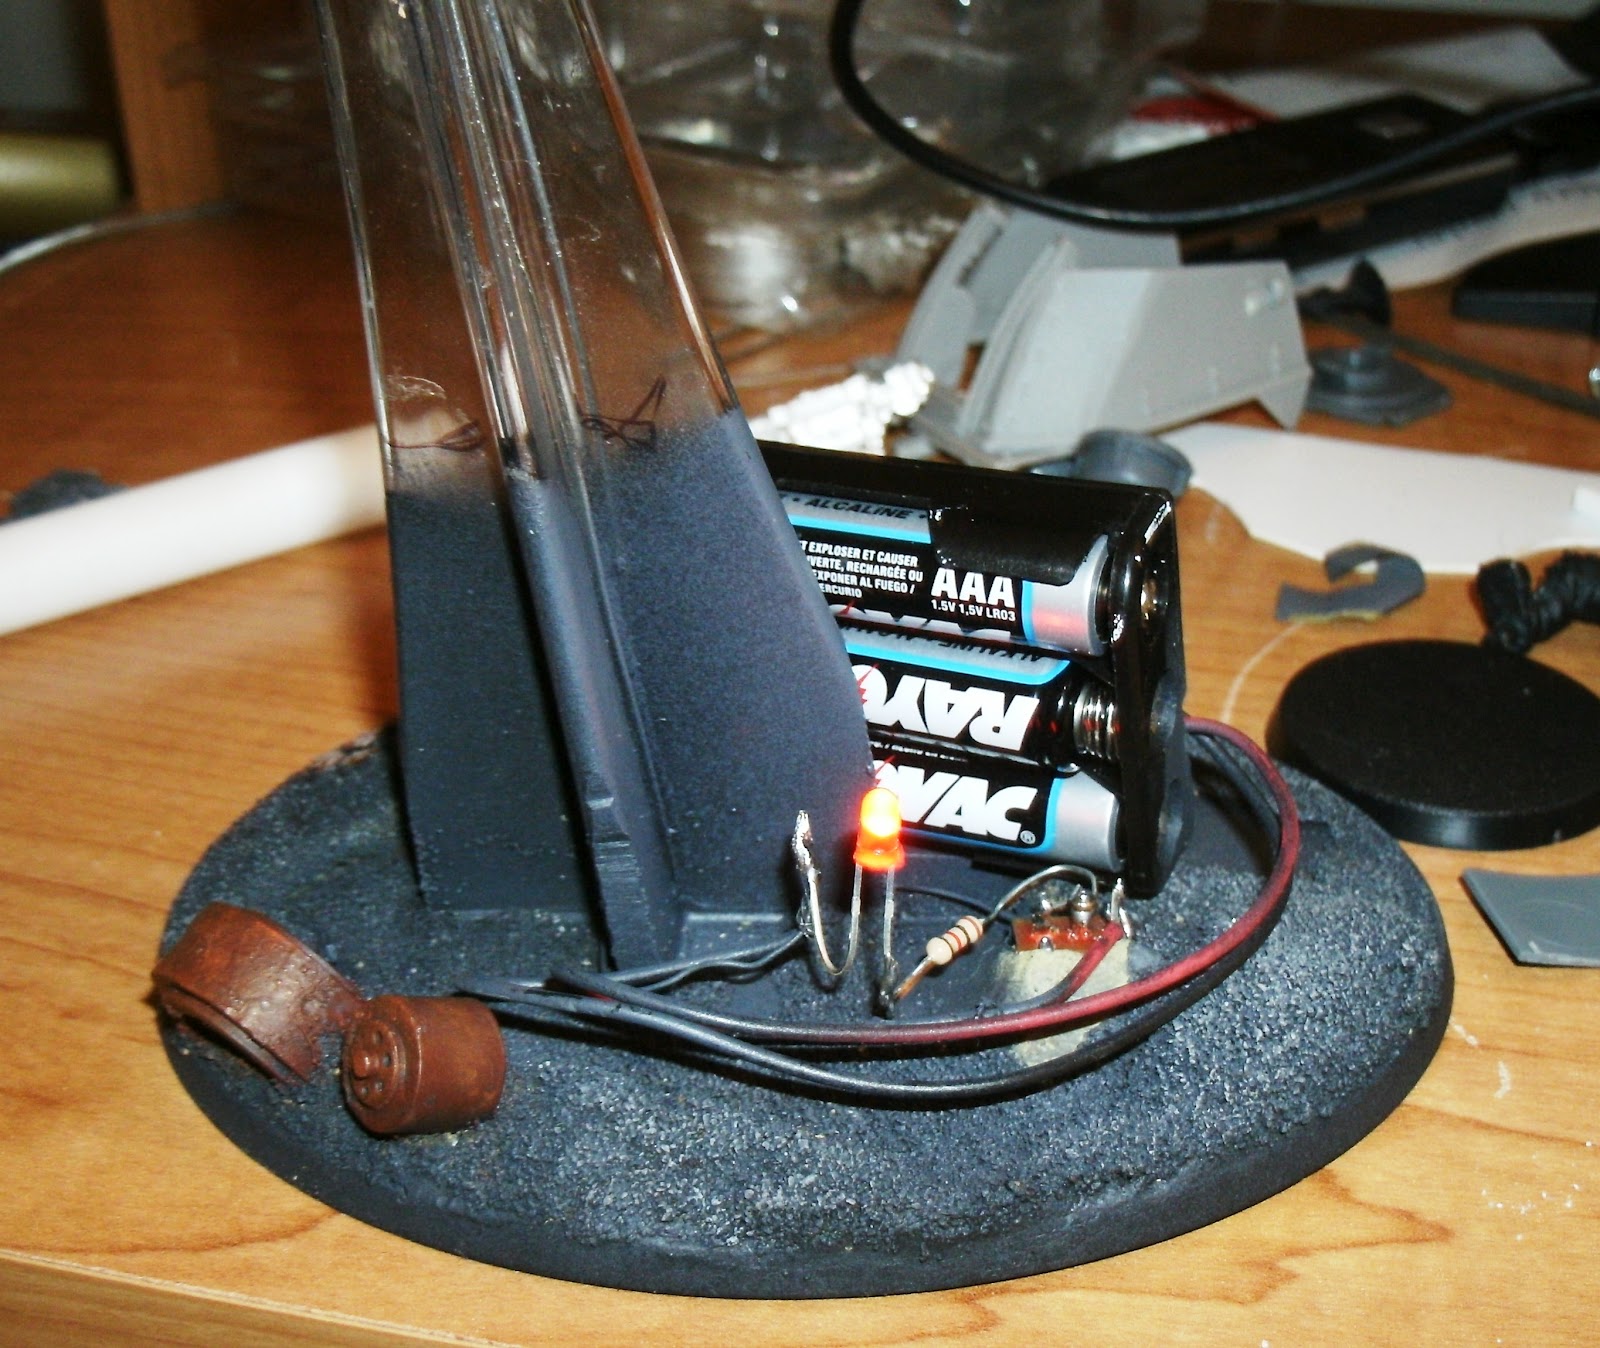
Some years ago, Dave Taylor built a beautiful Custodes army, one of my favorite models from that army was a Dreadnaught converted from the Throne of Judgement.  I happened to have a Throne of Judgement lying around that I had scavenged parts from, so I decided to use it to build a Grey Knights Venerable Dreadnaught.

 To build the sarcophagus, I obtained  the bit from the plastic ven-dread kit from a bitz seller. I wanted the pieces to look sufficiently grey knight-ish, so I got the helmeted head from the Dread Knight kit.  Lastly, I wanted to build this as a rifle-man dread, after looking around, I settled on using the reaper autocannon from the Defiler kit -- Reaper autocannon on a Grey Knights model?  HERESY!


To de-chaos the reapers, I removed the bayonets and filed off some of the spikes, then I covered up the Demon mouth with a magazine from the IG Heavy Weapons set.

The arms holding the autocannon were built using the hydraulic cylinders from the IG Vehicle accessory sprue, the searchlight from the same source and some plastic tubing cut at an angle.

And a few paint-in-progress shots:

Tuesday, August 21, 2012

Horus Heresy Trailer

A  trailer for the for first Forgeworld Horus Heresy book has appeared here.  It will debut at  Gamesday UK.  Hat tip to Apocalypse 40K.

GW needs to get whoever made this trailer to do the mainstream GW trailers.

Friday, August 17, 2012

Stretched Stormraven Part 1

The biggest problem that I have with the Stormraven is that it's too short -- it's supposed to have the same troop capacity as the Land Raider but clearly the troop compartment is smaller. 

To make the troop compartment large enough  means lengthening it by about 1.5 inches to my eyes.  I decided to take the same approach as Chapterhouse by adding the length to the rear of the hull.  Why not just go with Chapterhouse's conversion kit?  Well, they extend the hull a bit too much to my eyes, about 2.5 inches.
 
I made the template for the hull side extensions by tracing the rear of the hull outline, shifting 1.5 inches and tracing again.  The result is here:


The side extensions are then fit in nicely.  The floor extension is a simple 2"x1.5" rectangle, I added tread plate to match the look of the stock floor.


Even though it will be difficult to see, I painted all of the interior bits prior to assembling the hull.


I'm not a huge fan of the "T" tail look, so I cut the tail and flipped it, so that the stabilizer is swept back and in the anhedral position.

An extra feature that I decided to add to this project was lights -- 4 white LED's for the headlights, 2 blue LED's to light the cockpit and turret, and two red LED's to light the cargo hold.  The panel lights create an interesting study in object source lighting.


The battery pack will be mounted on the base with  silver buss wire running up the flying stand.  The socket for the stand will provide the contact point for the battery power.


Here's a shot showing the headlights, pilot console lights and the interior red lights illuminated.  Completing the model now is largely a matter of final assembly and painting.  The last really big challenge is building terrain on the base to hide the battery pack while still allowing for removal to change the batteries.