Monday, July 4, 2016

More Ragnaroks Inbound

Recently, a client contacted me about the possibility of building some sort of a heavy tank for his IG.  He sent me a picture of an Ork tank that he had seen online.  I sent him the picture on the right and asked if something like that would suit;  he said yes and so it was on.  As I was planning on building another for myself anyway, I decided that this was as good a time as any to begin.

I started by recreating the templates I used to make the side armor and turret of the original.  Recreating?  Yeah some idiot (me) lost the file that the originals were in.  Here's what it looks like. If you want to do this yourself, print the templates so that the scale is 1" square.


I attach the template to 0.030" plasticard using spray adhesive and cut to shape; the paper over the plastic along with a straight edge helps to keep the blade from wandering

Here all the pieces are cut out:


The side armor panels are 'dressed up with 0.06" C-channel which helps to add some texture giving the illusion of detail.


Spacers are made from 3/16" and 1/4" tubing 5/32" long.  The 3/16" spacers fit over the pins on the inside of the track pieces:


 A section of doubled track is used to set the spacing.  The doubled track is reinforced with a bit of plasticard.

I attach the side panels and temporarily assemble the hull:  Looks pretty mean:


 Attaching the demolisher hull top requires a bit of cutting to fit and filling with platsticard:


 The completed main hull:
  The new KV-2 style turret is built up from plasticard with some structural shapes for reinforcement.

The magnetized gun mount;  this one is really over-built as the client wanted to use an old metal Demolisher cannon which is heavy and requires a lot of support:
 I used the circle cutter and structural pieces to build up the turret ring and mount.
The trackguards are built up from plasticard and 0.10" C-Channel.


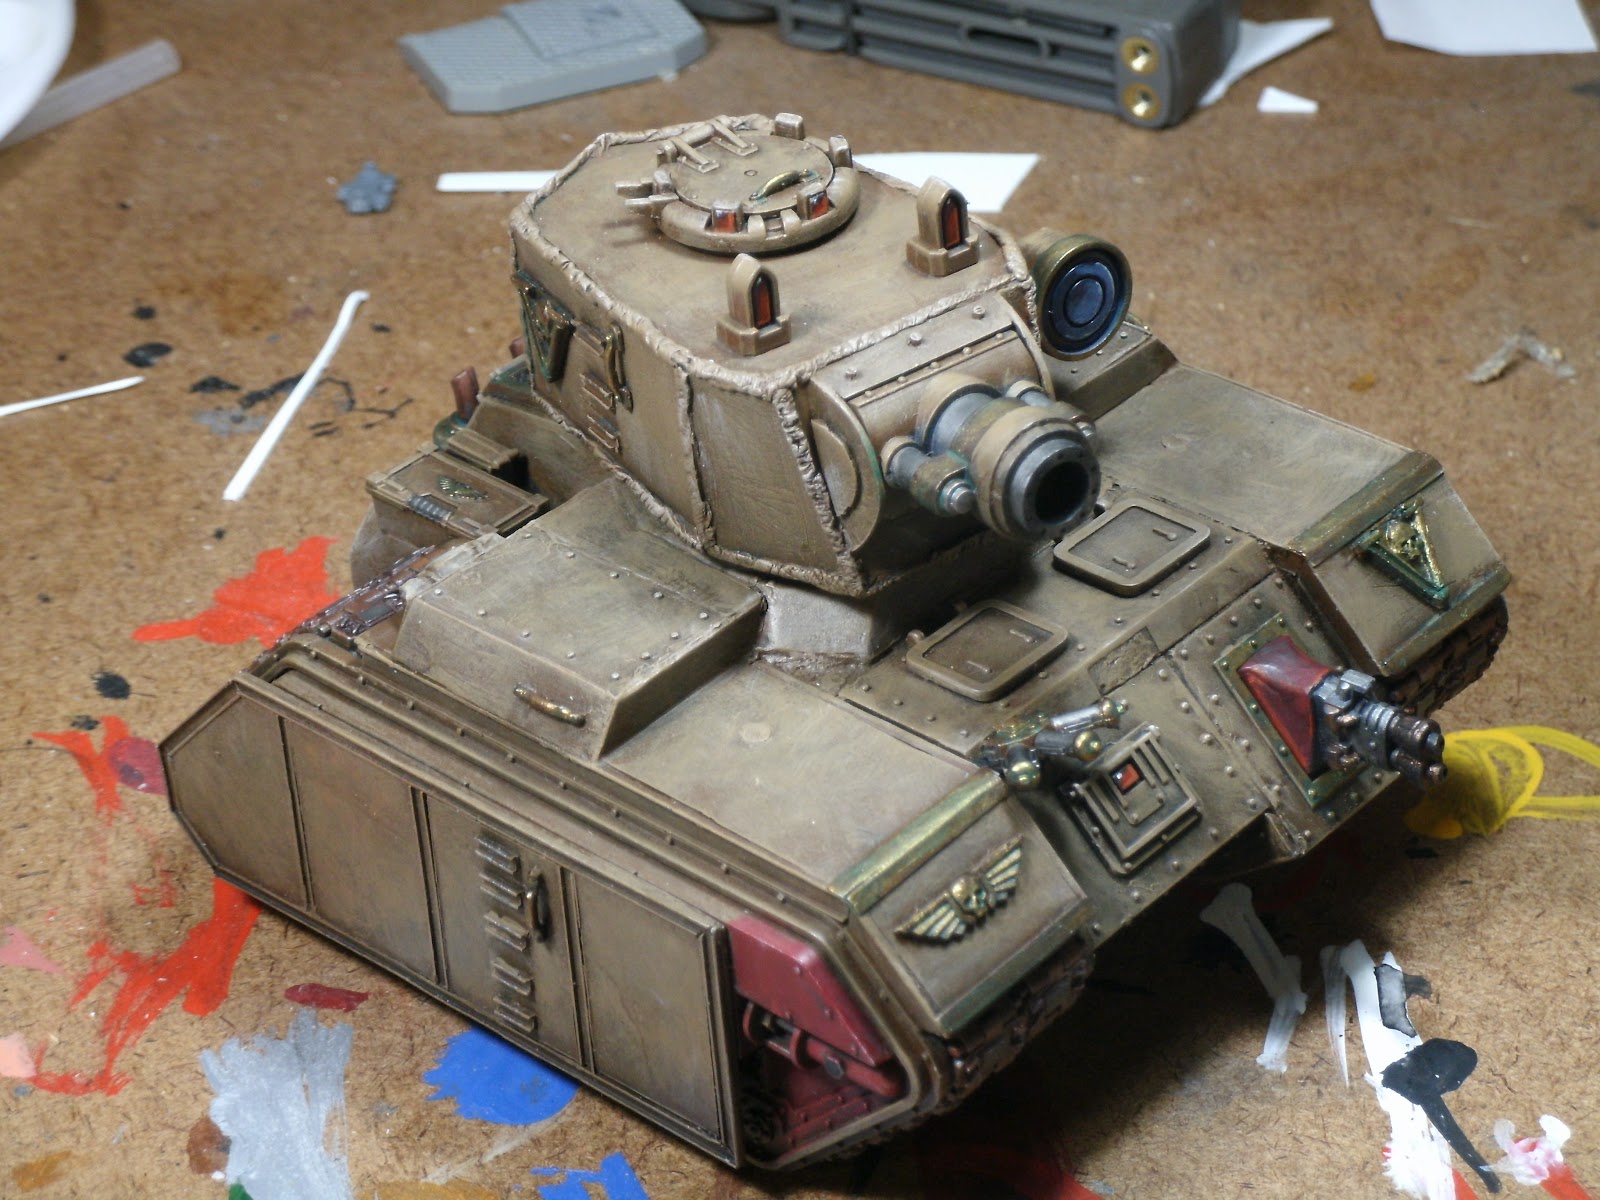
 Here's the finished product:


 The client's remark when he saw it in person: "Man, this things a beast!"

Wednesday, May 4, 2016

May The Fourth Be With You

Yes, it's time again for the Con Geek:


Friday, March 11, 2016

Commission: Storm Talon Conversion

I was contacted by very pleasant gentleman who asked if I could convert a Storm Talon for him, along the lines of one he'd seen on Dakka Dakka

Absolutely!  Actually it's a  pretty simple conversion  which should look pretty good when completed.

After assembling the cockpit area, I started in on the conversion work; the first step was to flip the tail which requires cutting the fins off of the fuselage halves.  Before re-attaching, I cut the now lower fins to match the line of the trailing edge of the fuselage.


In order to ensure a strong joint and maintain alignment, I created a sort of spar from plasticard.


The fuselage halves with flipped tail:


Next, the wings for this conversion use the tail-plane of the model cut in half, and used in lieu of the little stub wings.


And the stub wings end up on the fuselage at the tail

Overall look:

I offered to magnetize the weapons pods; he sent some magnets, but I opted to use some from my own stock since I want to ensure a secure fit.  The smaller magnets may work but I'm a bit paranoid about magnetized parts falling off.  The magnets inside the pod are 6mm disks, while the magnets on the options are 3mm x 3mm disks.  The magnets are slightly counter-sunk into the options and end up going into the body of the pod -- they end up interlocking as well as pulling the parts together.

Really the last thing to do is to mount the Ravenwing assault cannons on the wing-tips.  One bit that original poster on Dakka failed to mention was that he did a cut and flip on the assault cannon, not hard to do as long as you're careful with the razor saw.

And the finished model with various weapon options:


Wednesday, March 2, 2016

Old Stuff Day 2016 -- Space Hulk Diorama Completed

Here's my blast from the past  for this year!  Originally from 2012.

Here's the completed Diorama;  Brother Omnio reports mutliple contacts on his auspex, Brother Zael stands ready to purge the adjacent compartment with cleansing flames as Brother Noctis prepares to activate the door.   Sergeant Gideon and Brother Deino stand ready to deal with anything that comes through the door.

A few more shots after the break

The construction article can be found here

Monday, February 29, 2016

Field Artillery, Vostroyan Style.


Knocked these together Friday night,to use as Thudd Guns, though I guess since they're rockets, they should be called something else?

I plan on redoing these however, since I just went with materials that I had on hand; the tubes are only 5/32" which feels a tad small for 40K's typically over-sized scaling; I think that 3/16" or 7/32" would be a bit more 40K scale.  some of the parts on the frame are a bit over-scale for my tastes. 


Anyway here's the final product all painted up, with my Master of Ordnance overseeing operations:


I'll do more of a construction article when I do the rebuild and build some proper great-coat crew.